
Patient match user experience
How a practice matches a patient in Inbox when SutureHealth cannot match them automatically.
The patient match user experience happens in Inbox, before a document can be approved or signed. SutureHealth matches the document to a patient in the receiving EMR. The screenshots are from eClinicalWorks. The same screens appear for every other EMR. Only the logo changes.
This is step 1 of post signature sync.
1. Automatic match
When a document arrives, SutureHealth searches the EMR with the demographics that came in from the sender. In most cases the patient matches on its own and no one has to do anything. The document then shows a matched status.

2. Match required
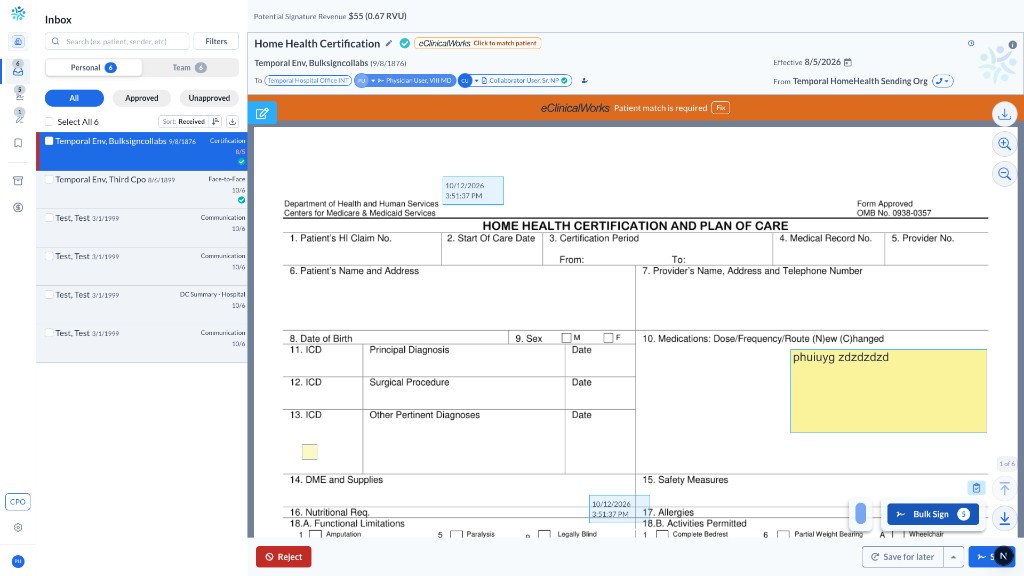
If that search does not find a patient, the document shows a banner that a patient match is required. Approve and sign stay unavailable until someone maps a patient. That includes:
- Approve
- Bulk approve
- Select and approve
- Sign
- Bulk sign
3. Search the EMR
Click the banner, or Fix. The match window opens.
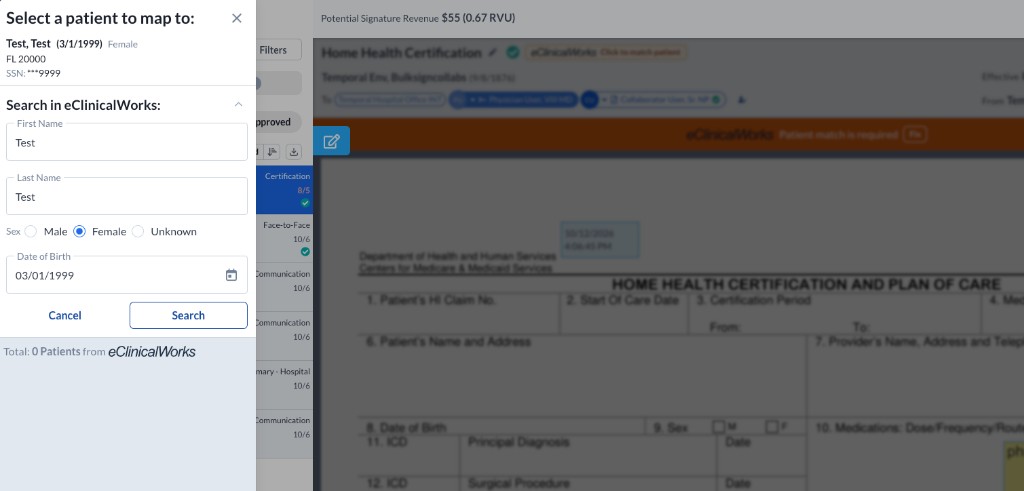
The top of the window is the patient as the sender sent them. Under that, search the EMR. You can search on any detail you have. If the name is spelled differently, try another spelling. If the date of birth is wrong or incomplete, search on something else. Filters narrow the list.
4. Map the patient
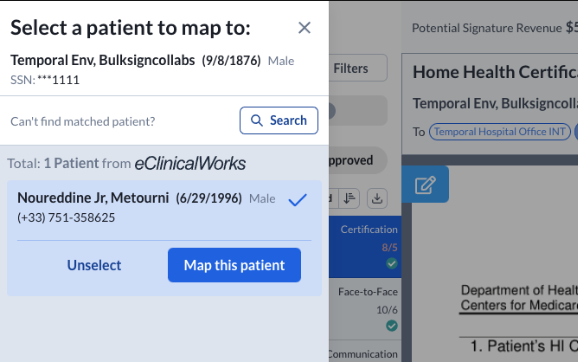
When the right patient is in the results, select that row and choose Map this patient. The document is then linked to that record.
5. Matched
After a match, automatic or manual, the document shows the matched patient. Approve and sign are available again, and sync can continue.
Updated 5 days ago